
Crossdeck for Framer — full setup guide
Everything from install to identity to revenue. Paste one Custom Code snippet into your Framer site and it loads the Crossdeck web SDK on every page — so page analytics, journeys, and front-end error impact start flowing with no per-page work. The snippet is paste-in: you provision on Crossdeck, then edit two values in the snippet and publish. This doc covers each step, plus the parts that need a decision from you: best-effort identity, a custom domain, and connecting a payment rail for revenue.
Framer has no site-script marketplace review. Third-party SDKs are added through Settings → Code — the same documented path GA / Fathom / Plausible use. Framer plugins are editor tools, not site-script injectors, so there is no app to submit and no approval email to wait on. Copy the snippet, fill in two values, publish.
TL;DR
- Provision, then paste. Create a project + app on Crossdeck (dashboard or
crossdeck init), copy your Publishable key (cd_pub_…) and App ID (app_…), then add the snippet via Settings → Code → Add Script and edit those two values. - No environment field. The environment is derived from the key prefix (
cd_pub_test_= sandbox, else production), so it can never be wrong. - Ingest-only key. The snippet holds only the publishable key. Never paste a secret or workspace key (
cd_sk_/cd_wk_). - Verify from the first real visit. Publish the site, open it, click around, then watch a live visitor land in Overview / People. That first heartbeat also locks your Allowed Origins.
- Custom domain = one 20-second step. The origin lock happens on the first heartbeat, so a custom domain added later must be added to your Allowed Origins yourself.
- Identity is best-effort. Framer published sites have no server-side user, so analytics is anonymous by default. If a gated area renders the signed-in email, add
data-crossdeck-identify-emailto the element carrying it and the snippet callsidentify()automatically. - Connect a rail for revenue. Connect Stripe (or Apple / Google) so revenue and entitlements join the same identity graph as analytics and errors.
What the connector does
Paste one Custom Code snippet and it loads the Crossdeck web SDK on every page of your Framer site — so page analytics, journeys, and front-end error impact start flowing with no per-page setup. Because Crossdeck joins identity, revenue, errors, and analytics on one identity graph, you can answer questions no single-layer tool can — for example, “which paying customers hit this error last week.”
The snippet holds only your publishable key (cd_pub_, ingest-only) plus your App ID. It loads @cross-deck/web from the CDN, calls init({ appId, publicKey, environment }), and makes a best-effort identify(). It is clean and safe by construction: an empty or wrong key is a silent no-op, an unreachable CDN is swallowed by onerror, and a page with no signed-in email simply stays anonymous.
Step 1 — Install
A. Provision on Crossdeck
- In the Crossdeck dashboard — or by running
crossdeck initin the Crossdeck CLI — create a project + app. - Copy your Publishable key (starts
cd_pub_) and your App ID (startsapp_).
B. Paste the snippet into Framer
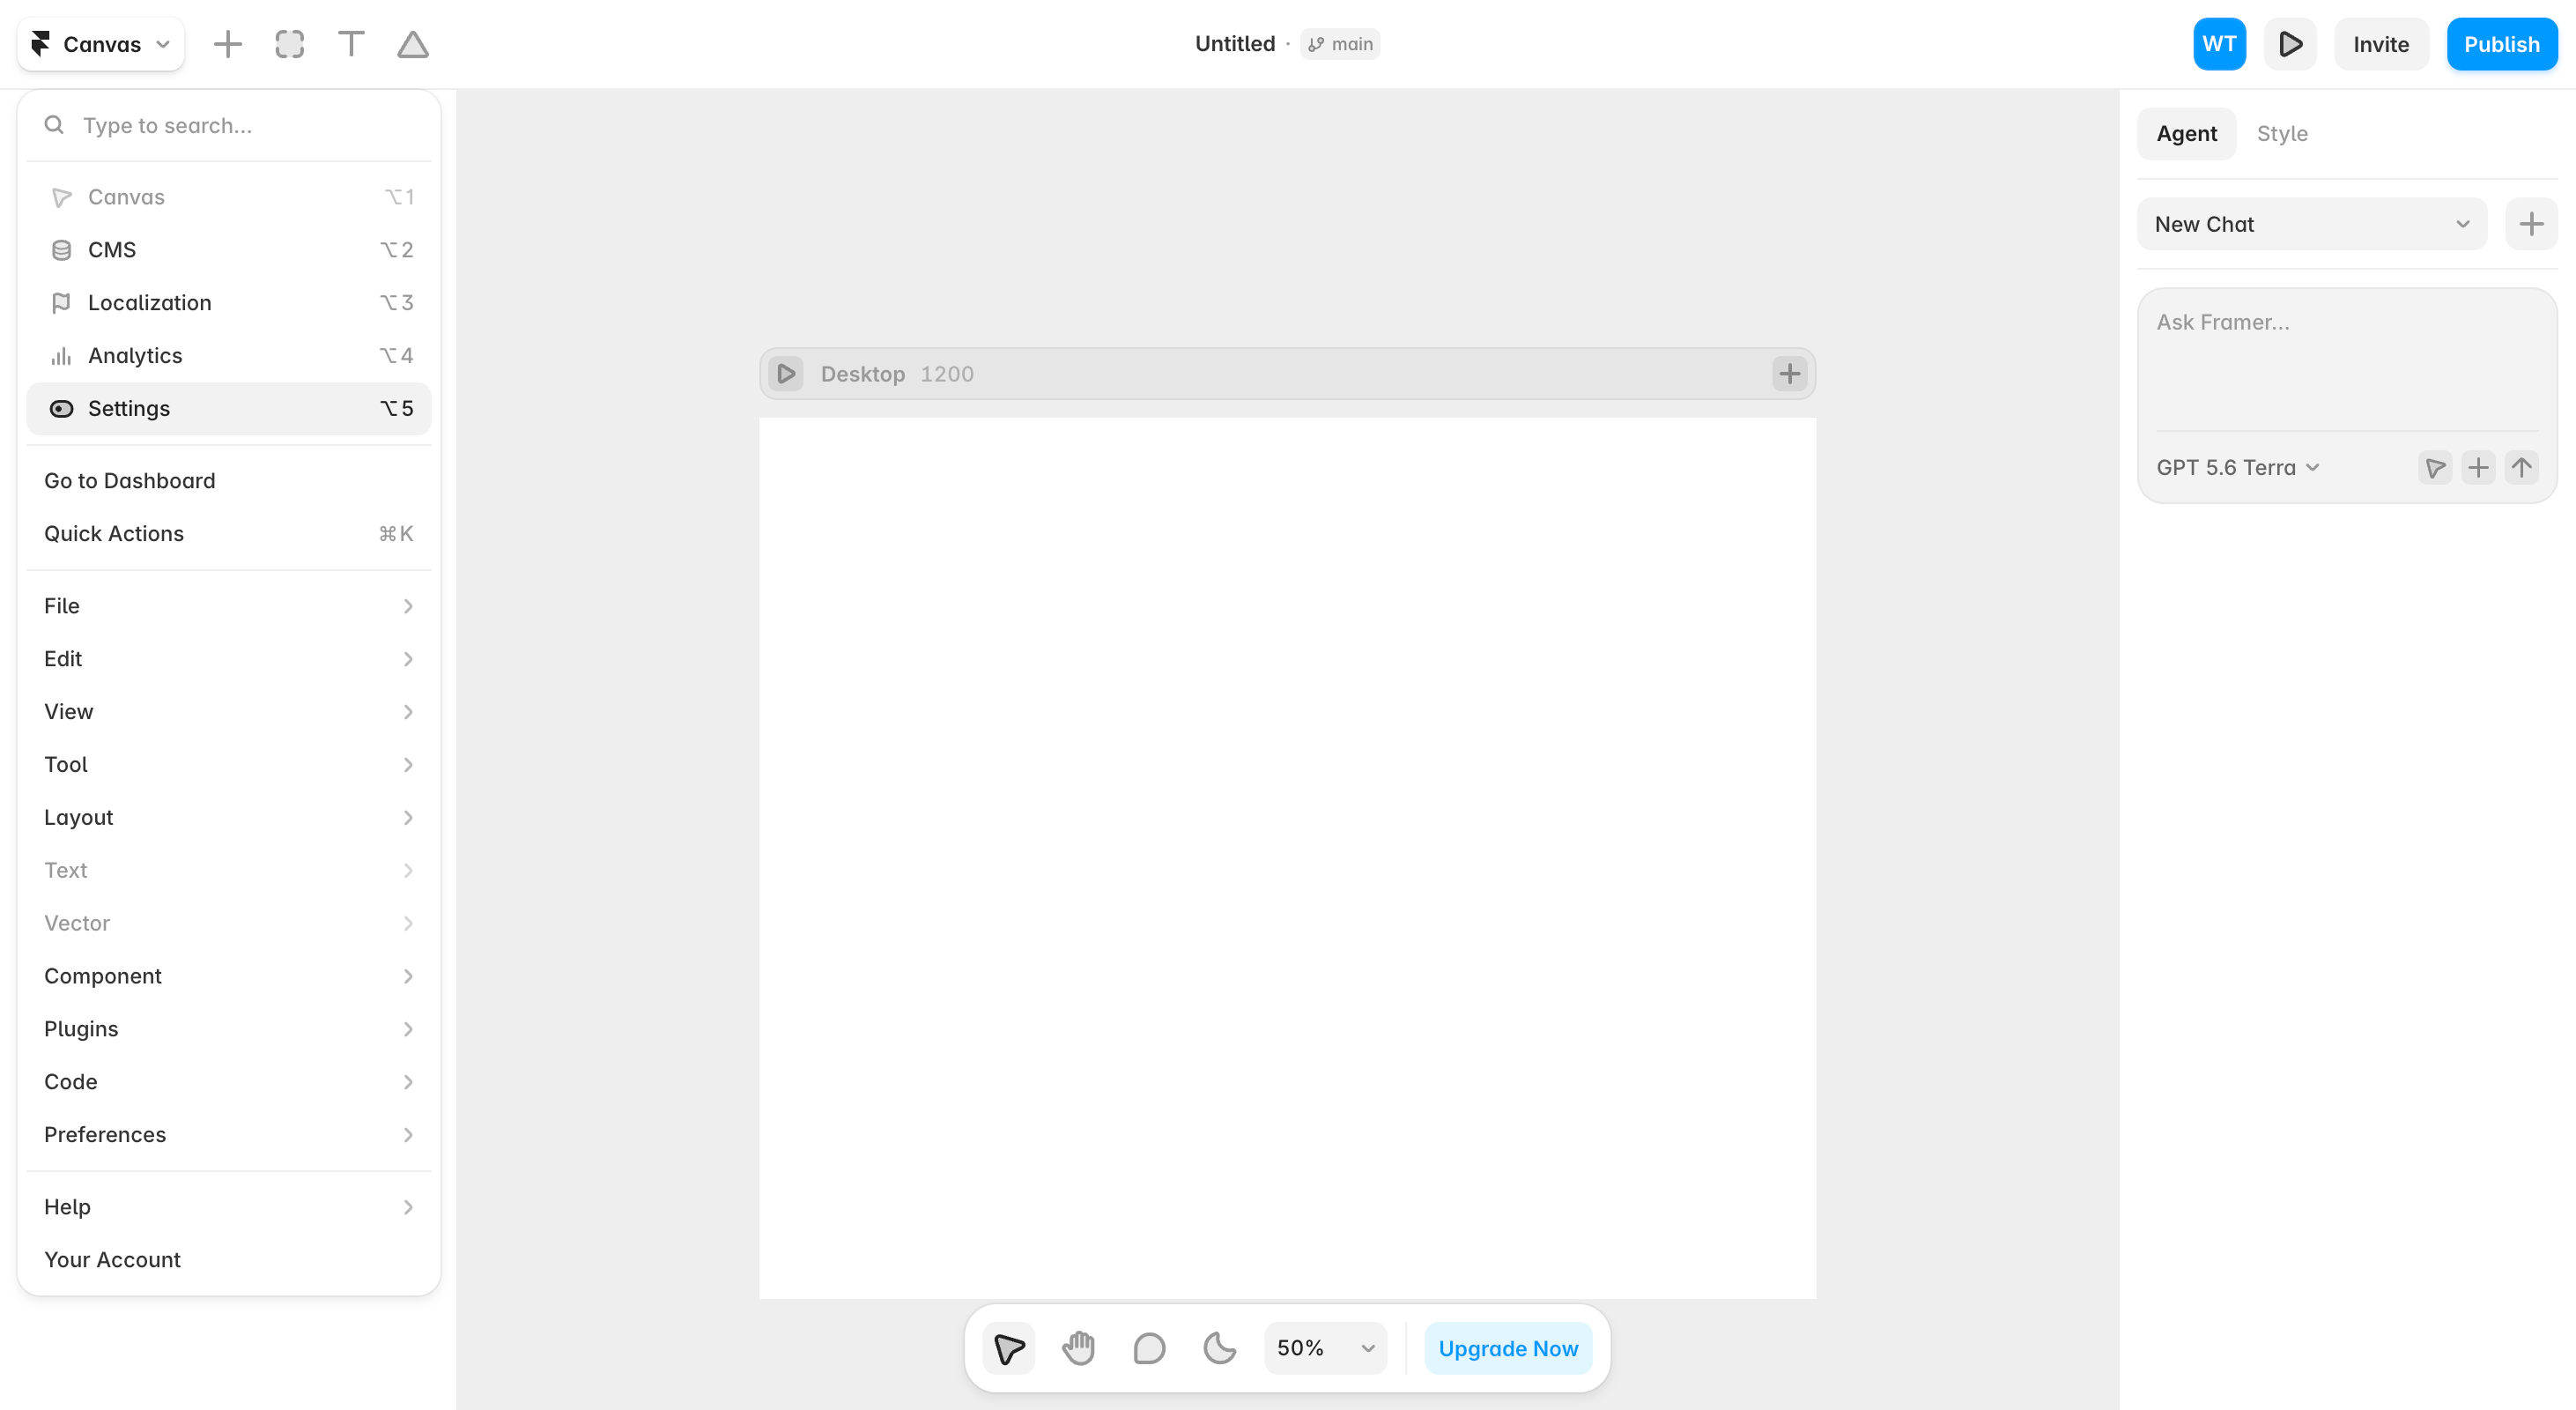
- In the Framer editor, open the top-left menu → Settings (or press
⌥5). - In the left sidebar under Site Settings, choose Code, then click Add Script.
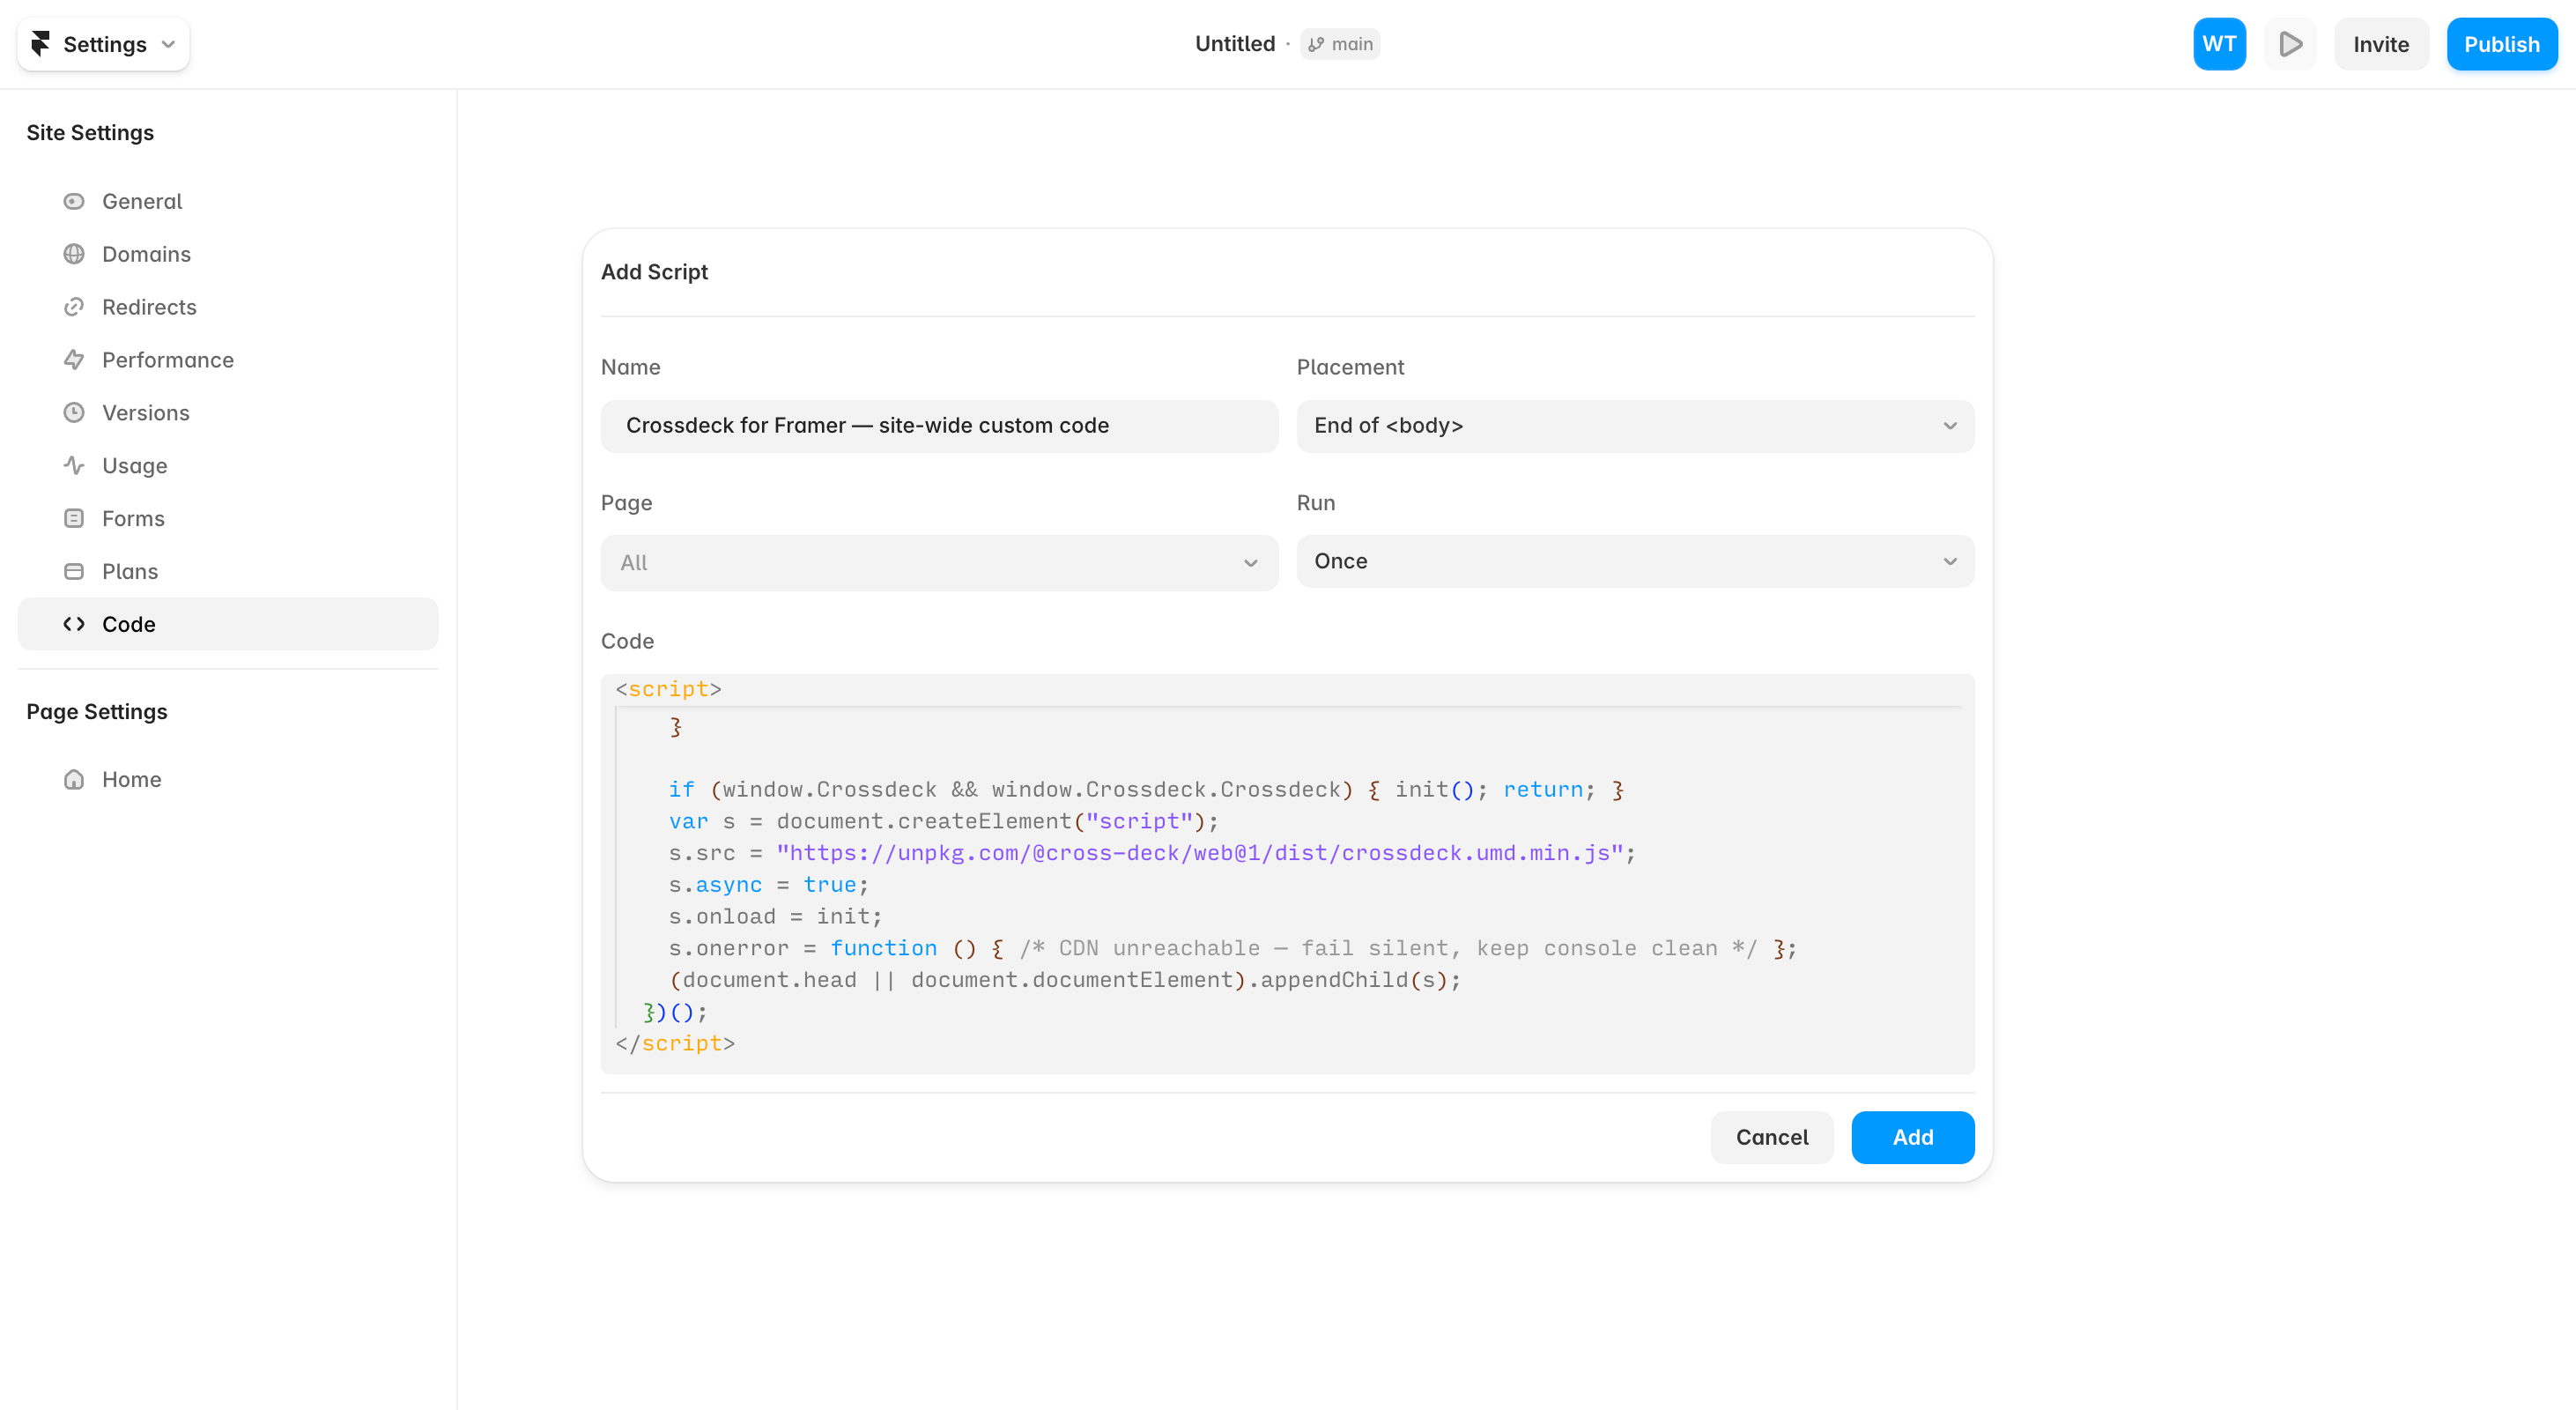
- In Add Script: paste the snippet below into Code; set Placement to “End of
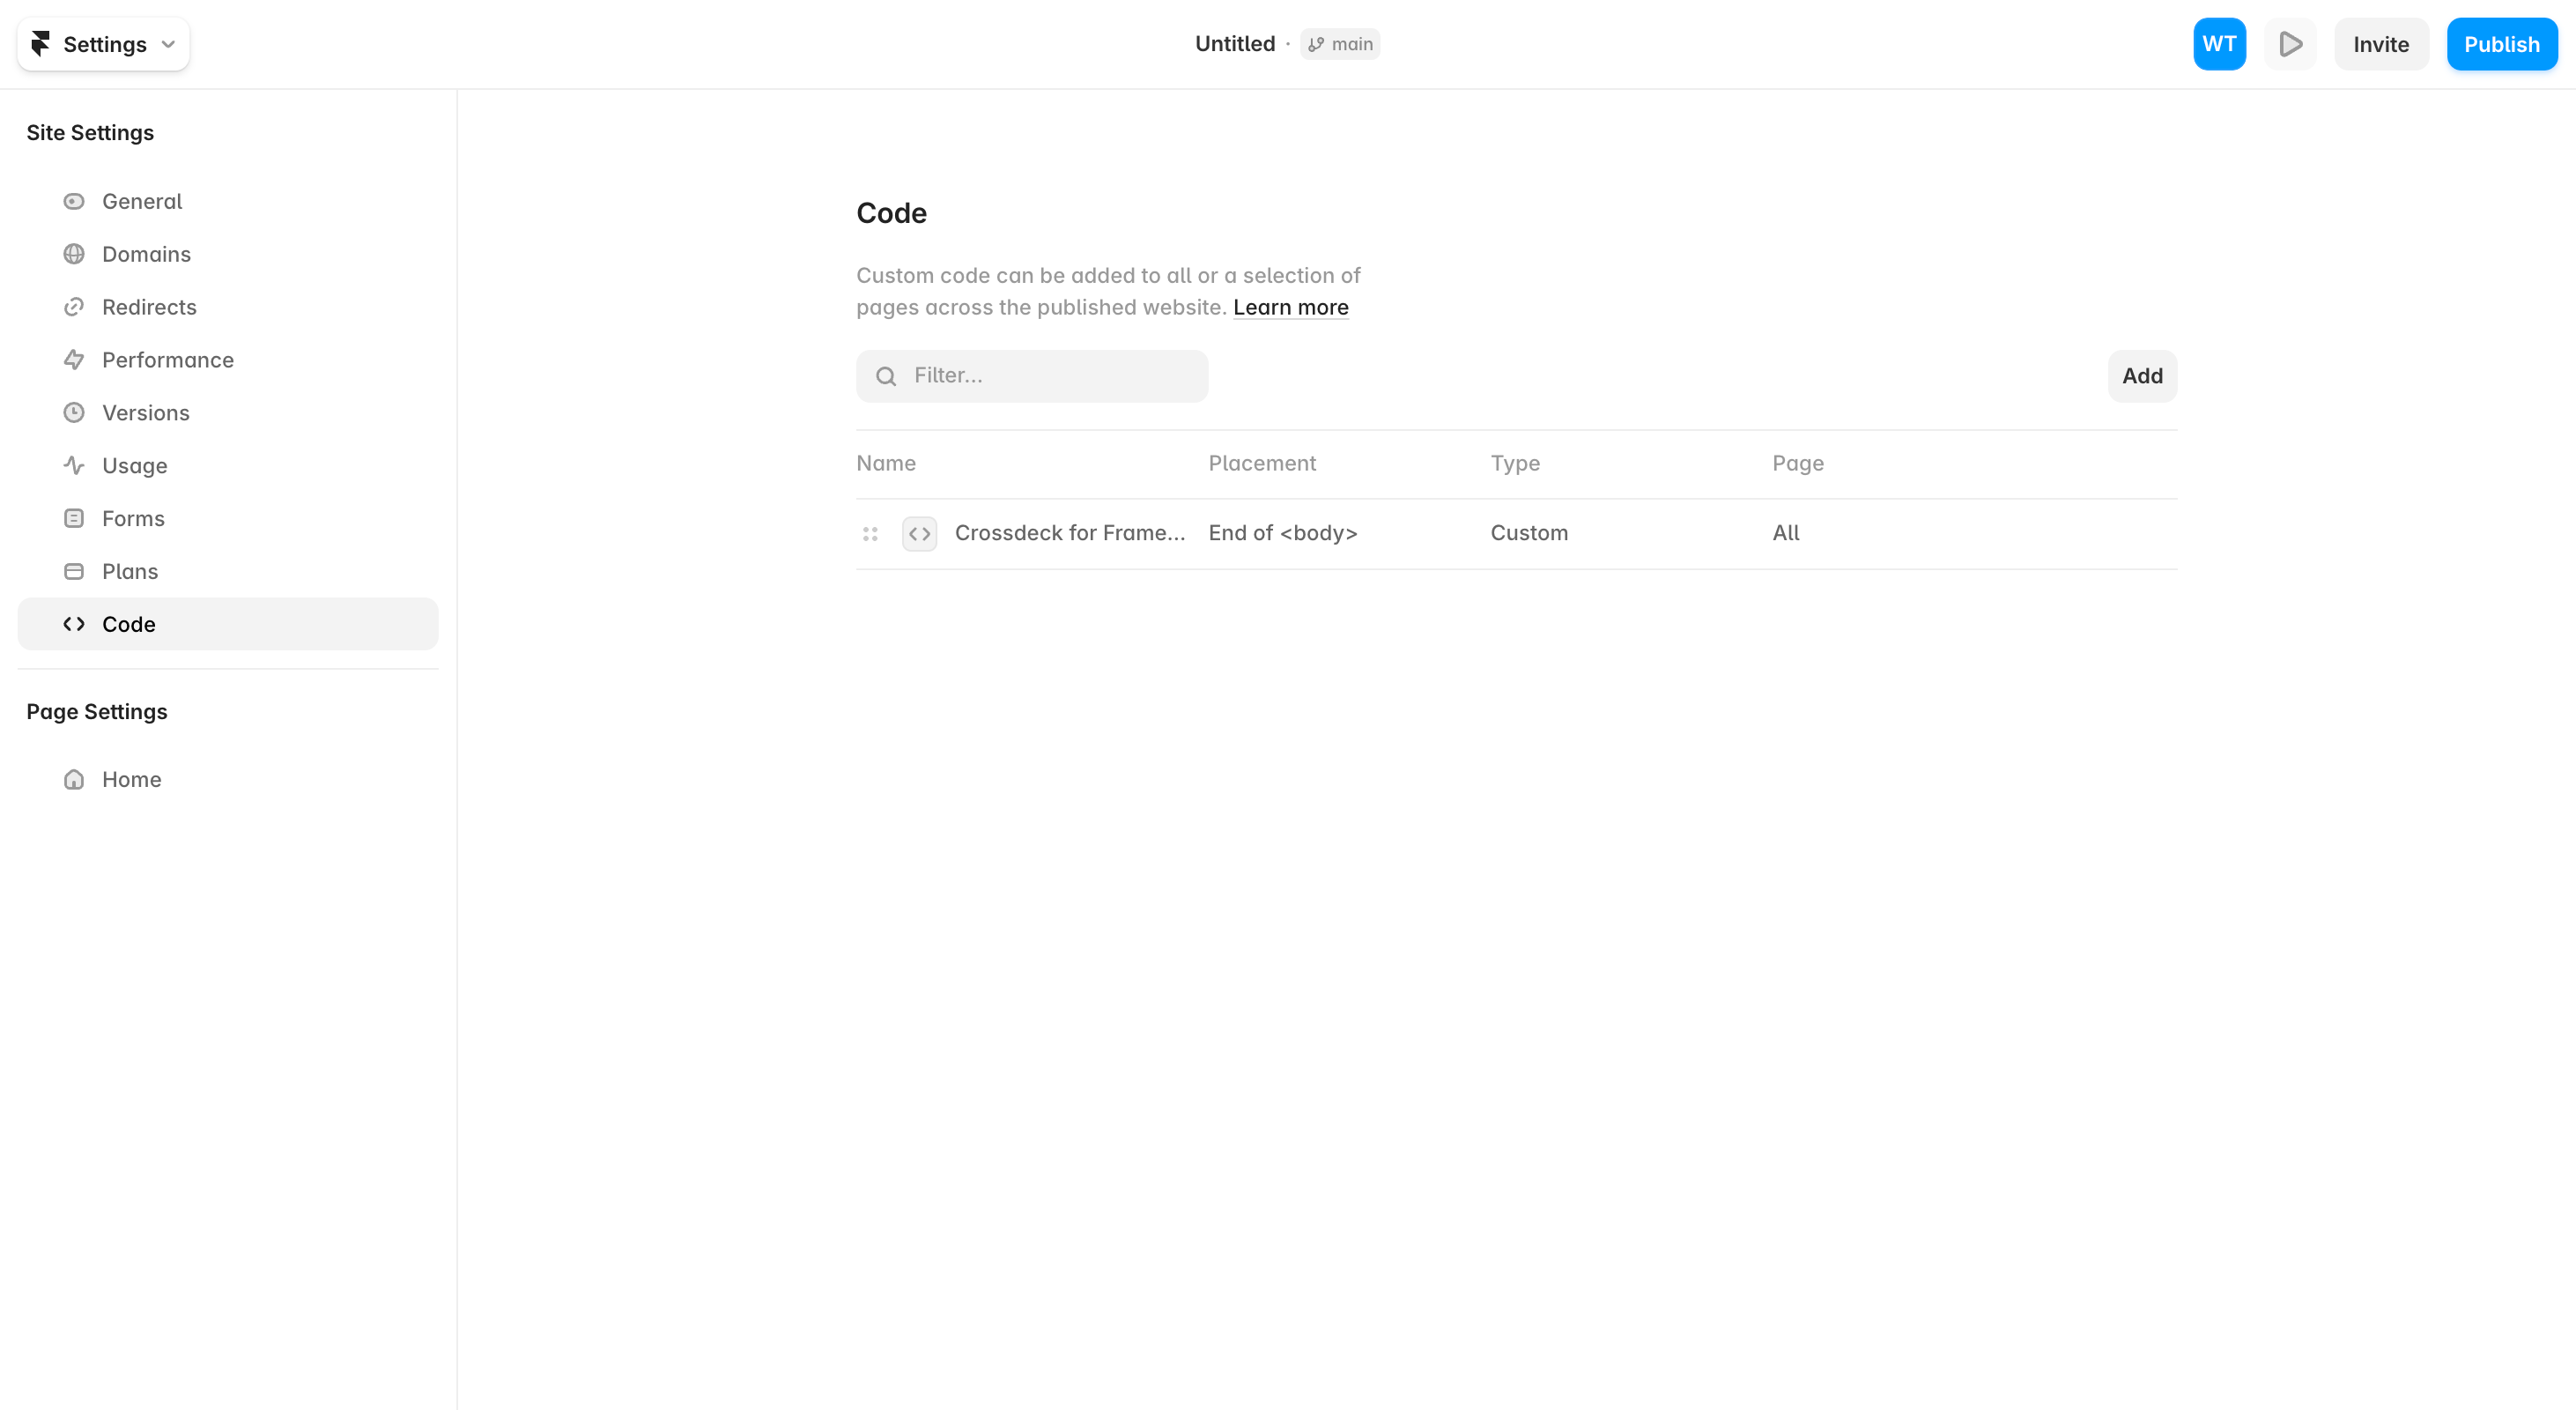
<body>” (or “End of<head>tag” — the loader is async, so either works), Page to All, and Run to Once. Click Add. - Publish the site — custom code only runs on the published site, not the editor preview.
⌥5).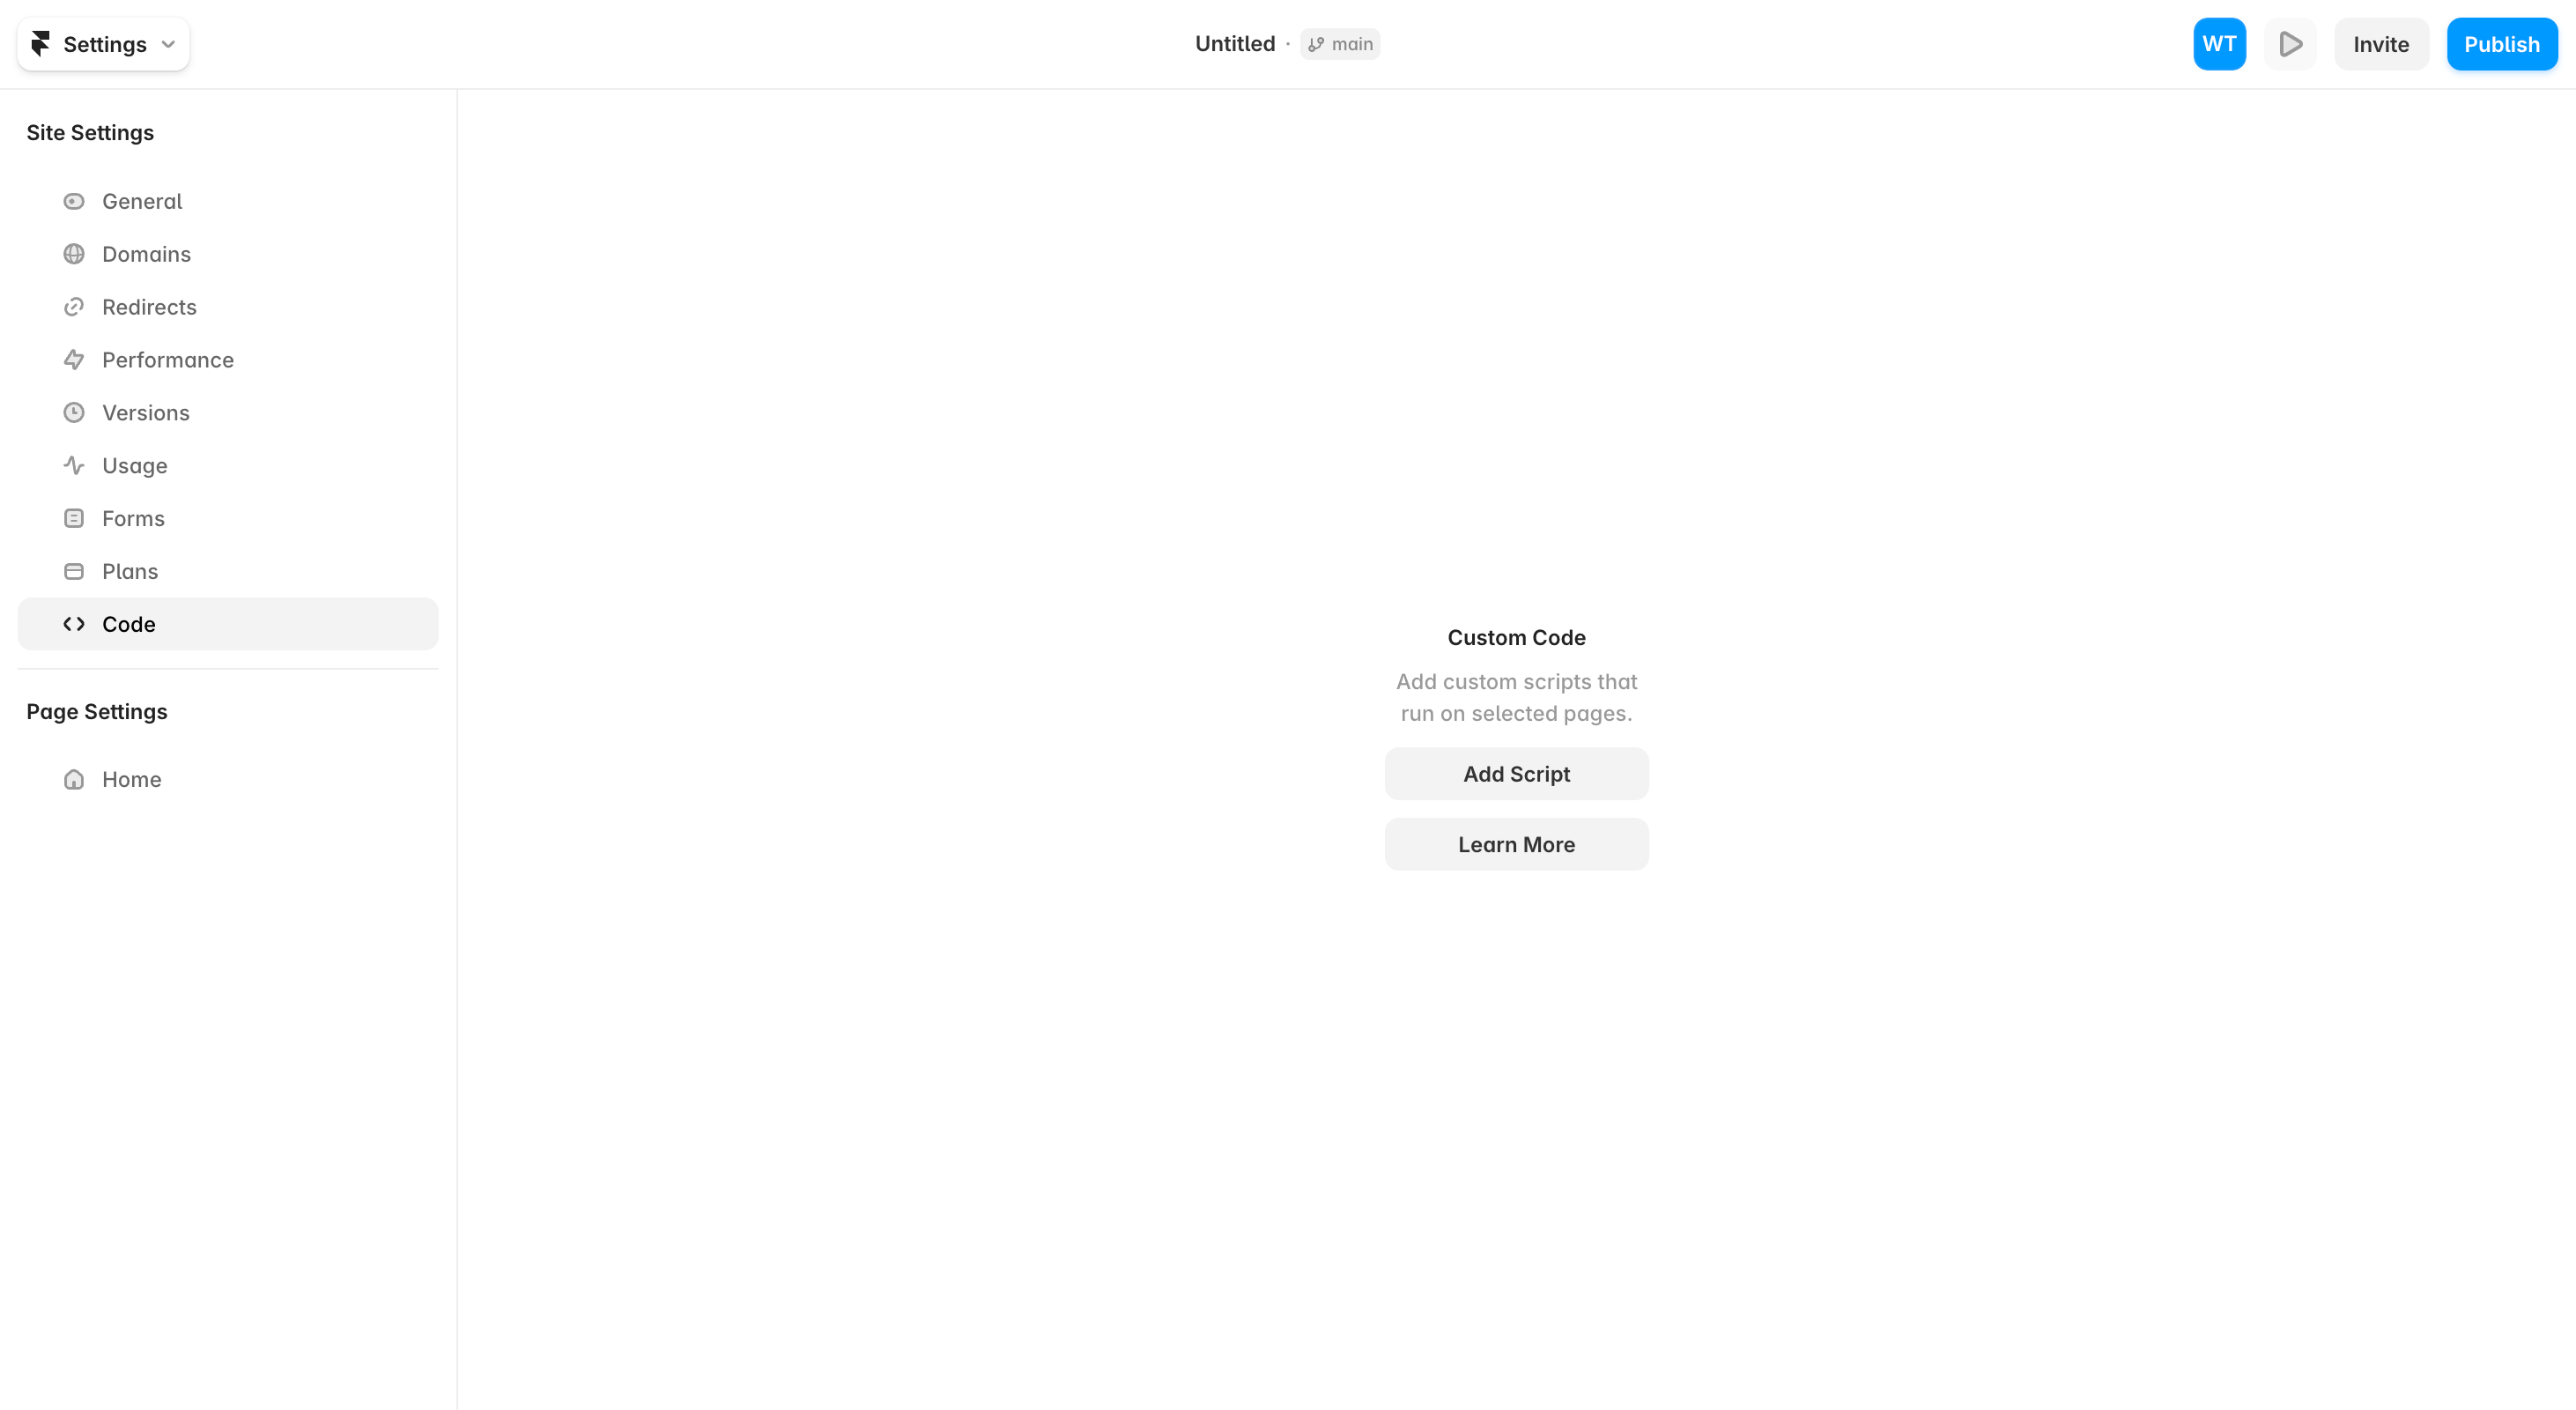
C. Edit the two values
Framer has no field-substitution for custom code, so you edit two values directly in the snippet: set PUBLISHABLE_KEY to your cd_pub_… key and APP_ID to your app_… ID. That's the only edit.
<!--
  Crossdeck for Framer — site-wide custom code
  ============================================
  Paste this ENTIRE block into Framer:
      Settings  →  Code  →  Add Script  →  paste into "Code"  →  Add  →  Publish
      Placement: "End of <body>" (or "End of <head> tag" — async loader, either works)
      Page: All    Run: Once

  It loads the Crossdeck web SDK on every page of your Framer site and starts
  capturing page analytics, journeys, and front-end error impact — no per-page
  work. Framer has no field-substitution for custom code, so you fill in TWO
  values below (your Publishable key + App ID from the Crossdeck dashboard, or
  from `crossdeck init` in the CLI). That's the only edit.

  Environment is DERIVED from the key prefix (cd_pub_test_… = sandbox, anything
  else = production), so it can never disagree with the key.

  Clean + safe by construction:
    • only a PUBLISHABLE key (cd_pub_) is ever placed here — never a secret
    • not filled in / wrong key         → silent no-op, nothing loads
    • SDK CDN unreachable               → onerror swallows, no throw
    • identify has no logged-in email   → no-op (Framer sites are usually anon)
-->
<script>
  (function () {
    "use strict";

    // ── FILL IN THESE TWO VALUES ─────────────────────────────────────────────
    var PUBLISHABLE_KEY = "cd_pub_XXXXXXXXXXXXXXXXXXXXXXXX"; // from your Crossdeck dashboard
    var APP_ID          = "app_XXXXXXXXXXXX";                // from your Crossdeck dashboard
    // ─────────────────────────────────────────────────────────────────────────

    // Not configured, or a non-publishable key was pasted: do nothing at all.
    if (!PUBLISHABLE_KEY || !APP_ID || PUBLISHABLE_KEY.indexOf("cd_pub_") !== 0) return;

    var environment = PUBLISHABLE_KEY.indexOf("cd_pub_test_") === 0 ? "sandbox" : "production";

    function init() {
      try {
        if (window.Crossdeck && window.Crossdeck.Crossdeck) {
          window.Crossdeck.Crossdeck.init({
            appId: APP_ID,
            publicKey: PUBLISHABLE_KEY,
            environment: environment
          });
          identifyIfPossible();
        }
      } catch (e) { /* never surface to the console */ }
    }

    // Best-effort identity. Framer published sites have no server-side user, so
    // — like the Webflow connector — we look for an element that carries the
    // signed-in person's email: add the attribute `data-crossdeck-identify-email`
    // to an element (e.g. inside a members-only area) whose text/value is the
    // email. Absent that (a normal marketing site), this is a silent no-op and
    // analytics simply stays anonymous.
    function identifyIfPossible() {
      try {
        var el = document.querySelector("[data-crossdeck-identify-email]");
        if (!el) return;
        var email = (el.getAttribute("data-crossdeck-identify-email") || el.textContent || "").trim();
        var CD = window.Crossdeck && window.Crossdeck.Crossdeck;
        if (email && CD && typeof CD.identify === "function") {
          CD.identify(email, { email: email });
        }
      } catch (e) { /* swallow */ }
    }

    if (window.Crossdeck && window.Crossdeck.Crossdeck) { init(); return; }
    var s = document.createElement("script");
    s.src = "https://unpkg.com/@cross-deck/web@1/dist/crossdeck.umd.min.js";
    s.async = true;
    s.onload = init;
    s.onerror = function () { /* CDN unreachable — fail silent, keep console clean */ };
    (document.head || document.documentElement).appendChild(s);
  })();
</script>There is deliberately no environment setting. The environment is read from the key prefix (cd_pub_test_… = sandbox, anything else = production), so it can never disagree with the key. Until PUBLISHABLE_KEY holds a valid cd_pub_ key and APP_ID is set, the snippet loads nothing — zero cost and a clean console.
The snippet holds only your publishable, ingest-only key (cd_pub_) — it cannot read or change your Crossdeck account. Never paste a secret or workspace key (cd_sk_ / cd_wk_). Provisioning happens on the Crossdeck engine, never in the Framer site.
Step 2 — Verify it's working
Publish the site (Custom Code doesn't run in the editor preview), open it, and click around. Crossdeck's first heartbeat auto-learns your site's origin. Then open the Crossdeck dashboard → Overview / People — you'll see a live visitor with geo, and the pages they viewed. (Data begins from the first real visit — that first heartbeat also locks your Allowed Origins to that domain.)
Check that you edited both PUBLISHABLE_KEY (cd_pub_…) and APP_ID (app_…) in the snippet, that you published the site (not just previewed the editor), and that the environment you're viewing in the dashboard matches the app/key. The first heartbeat can take a few moments.
Step 3 — Custom domain
When you move to or add a custom domain, add it to your Allowed Origins — 20 seconds, and it pulls you into the dashboard:
→ Add a domain to your Allowed Origins
A Framer site first served on *.framer.app (or *.framer.website) learns that origin on its first heartbeat. It will not auto-learn a custom domain you add later — you must add the custom domain to your Allowed Origins yourself, or traffic from it won't be accepted.
Step 4 — Identity (best-effort on Framer)
Analytics works anonymously out of the box. Framer published sites have no server-side user — and a Framer site is usually a marketing site — so identity is best-effort, not automatic. This is the honest difference from WordPress, where a server-side login hook resolves users for you. Don't expect automatic identity on Framer; anonymous analytics is the default and often exactly right.
If your site does have a members / gated area that renders the signed-in person's email, you can turn those visitors into known people — the same mechanism the Webflow connector uses:
- Find the element that displays the signed-in person's email (for example, inside a members-only area).
- Add the attribute
data-crossdeck-identify-emailto that element — either carrying the email as its value, or wrapping the element whose text is the email. - Publish. On each page load the snippet looks for that attribute and, if it finds an email, calls
identify(email)automatically.
Absent that attribute (a normal marketing site), identify() is a clean no-op and analytics simply stays anonymous — nothing to configure and nothing that errors.
Crossdeck keys identity on email — the no-backend join rail — so the email you expose via data-crossdeck-identify-email is what joins this visitor to the same person across revenue, errors, and analytics. (See How identity works for the full model.)
Step 5 — Revenue (connect a payment rail)
To join revenue to those people:
- In the Crossdeck dashboard, open Developers → Rails (Payment rails).
- Connect Stripe (or Apple / Google) in one click — Crossdeck never asks for a raw secret key.
- Stamp the Crossdeck reference onto your checkout / subscription events so each payment threads back to the right person. See Rails → Stripe in the dashboard for the exact one-liner.
Once a rail is connected, revenue and entitlements join the same identity graph as your analytics and errors. (Sending revenue events is done from your Crossdeck account setup — not from the Framer snippet.)
How this differs from the other connectors
- Framer (this): add a Custom Code snippet via Settings → Code and edit two values (no marketplace app). Identity is best-effort via a
data-crossdeck-identify-emailattribute. - WordPress: install the plugin. Identity is automatic — a server-side login hook resolves the signed-in user for you.
- Bubble: add the plugin and paste your Publishable key + App ID. Identity via the “Crossdeck – Identify user” workflow action.
- Webflow: one-click OAuth marketplace install → account + project auto-created → SDK injected. Identity via a
data-crossdeck-identify-emailbinding.
Every connector loads the same Crossdeck SDK and feeds the same dashboard — only the install + identity binding differ per platform.
Crossdeck for Framer — paste-in Custom Code snippet via Settings → Code (edit Publishable key + App ID), SDK loaded on every page, environment derived from the key prefix, custom-domain add via Allowed Origins, best-effort identity via data-crossdeck-identify-email, and revenue on a connected rail (August 4, 2026). Related: Identify users, Connect Stripe.
Using an AI assistant? Read this page as clean markdown — index.md — or the whole docs index at /docs/llms.txt.